


🛠️ Nail every joint like a pro — precision, stability, and smoothness in one sleek jig!
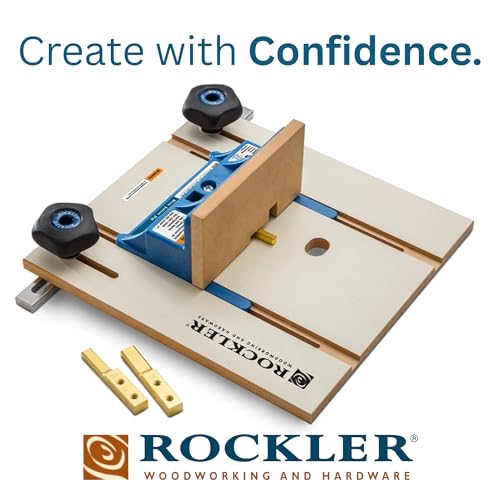
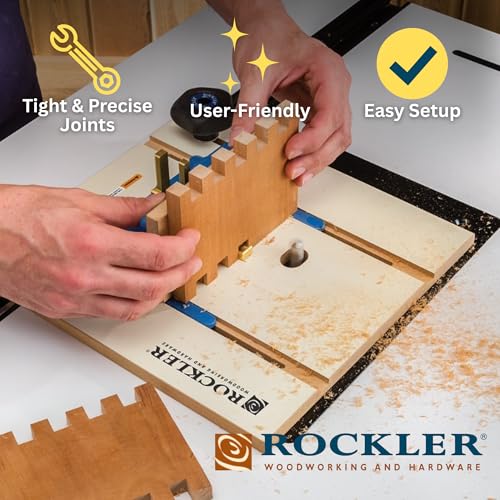
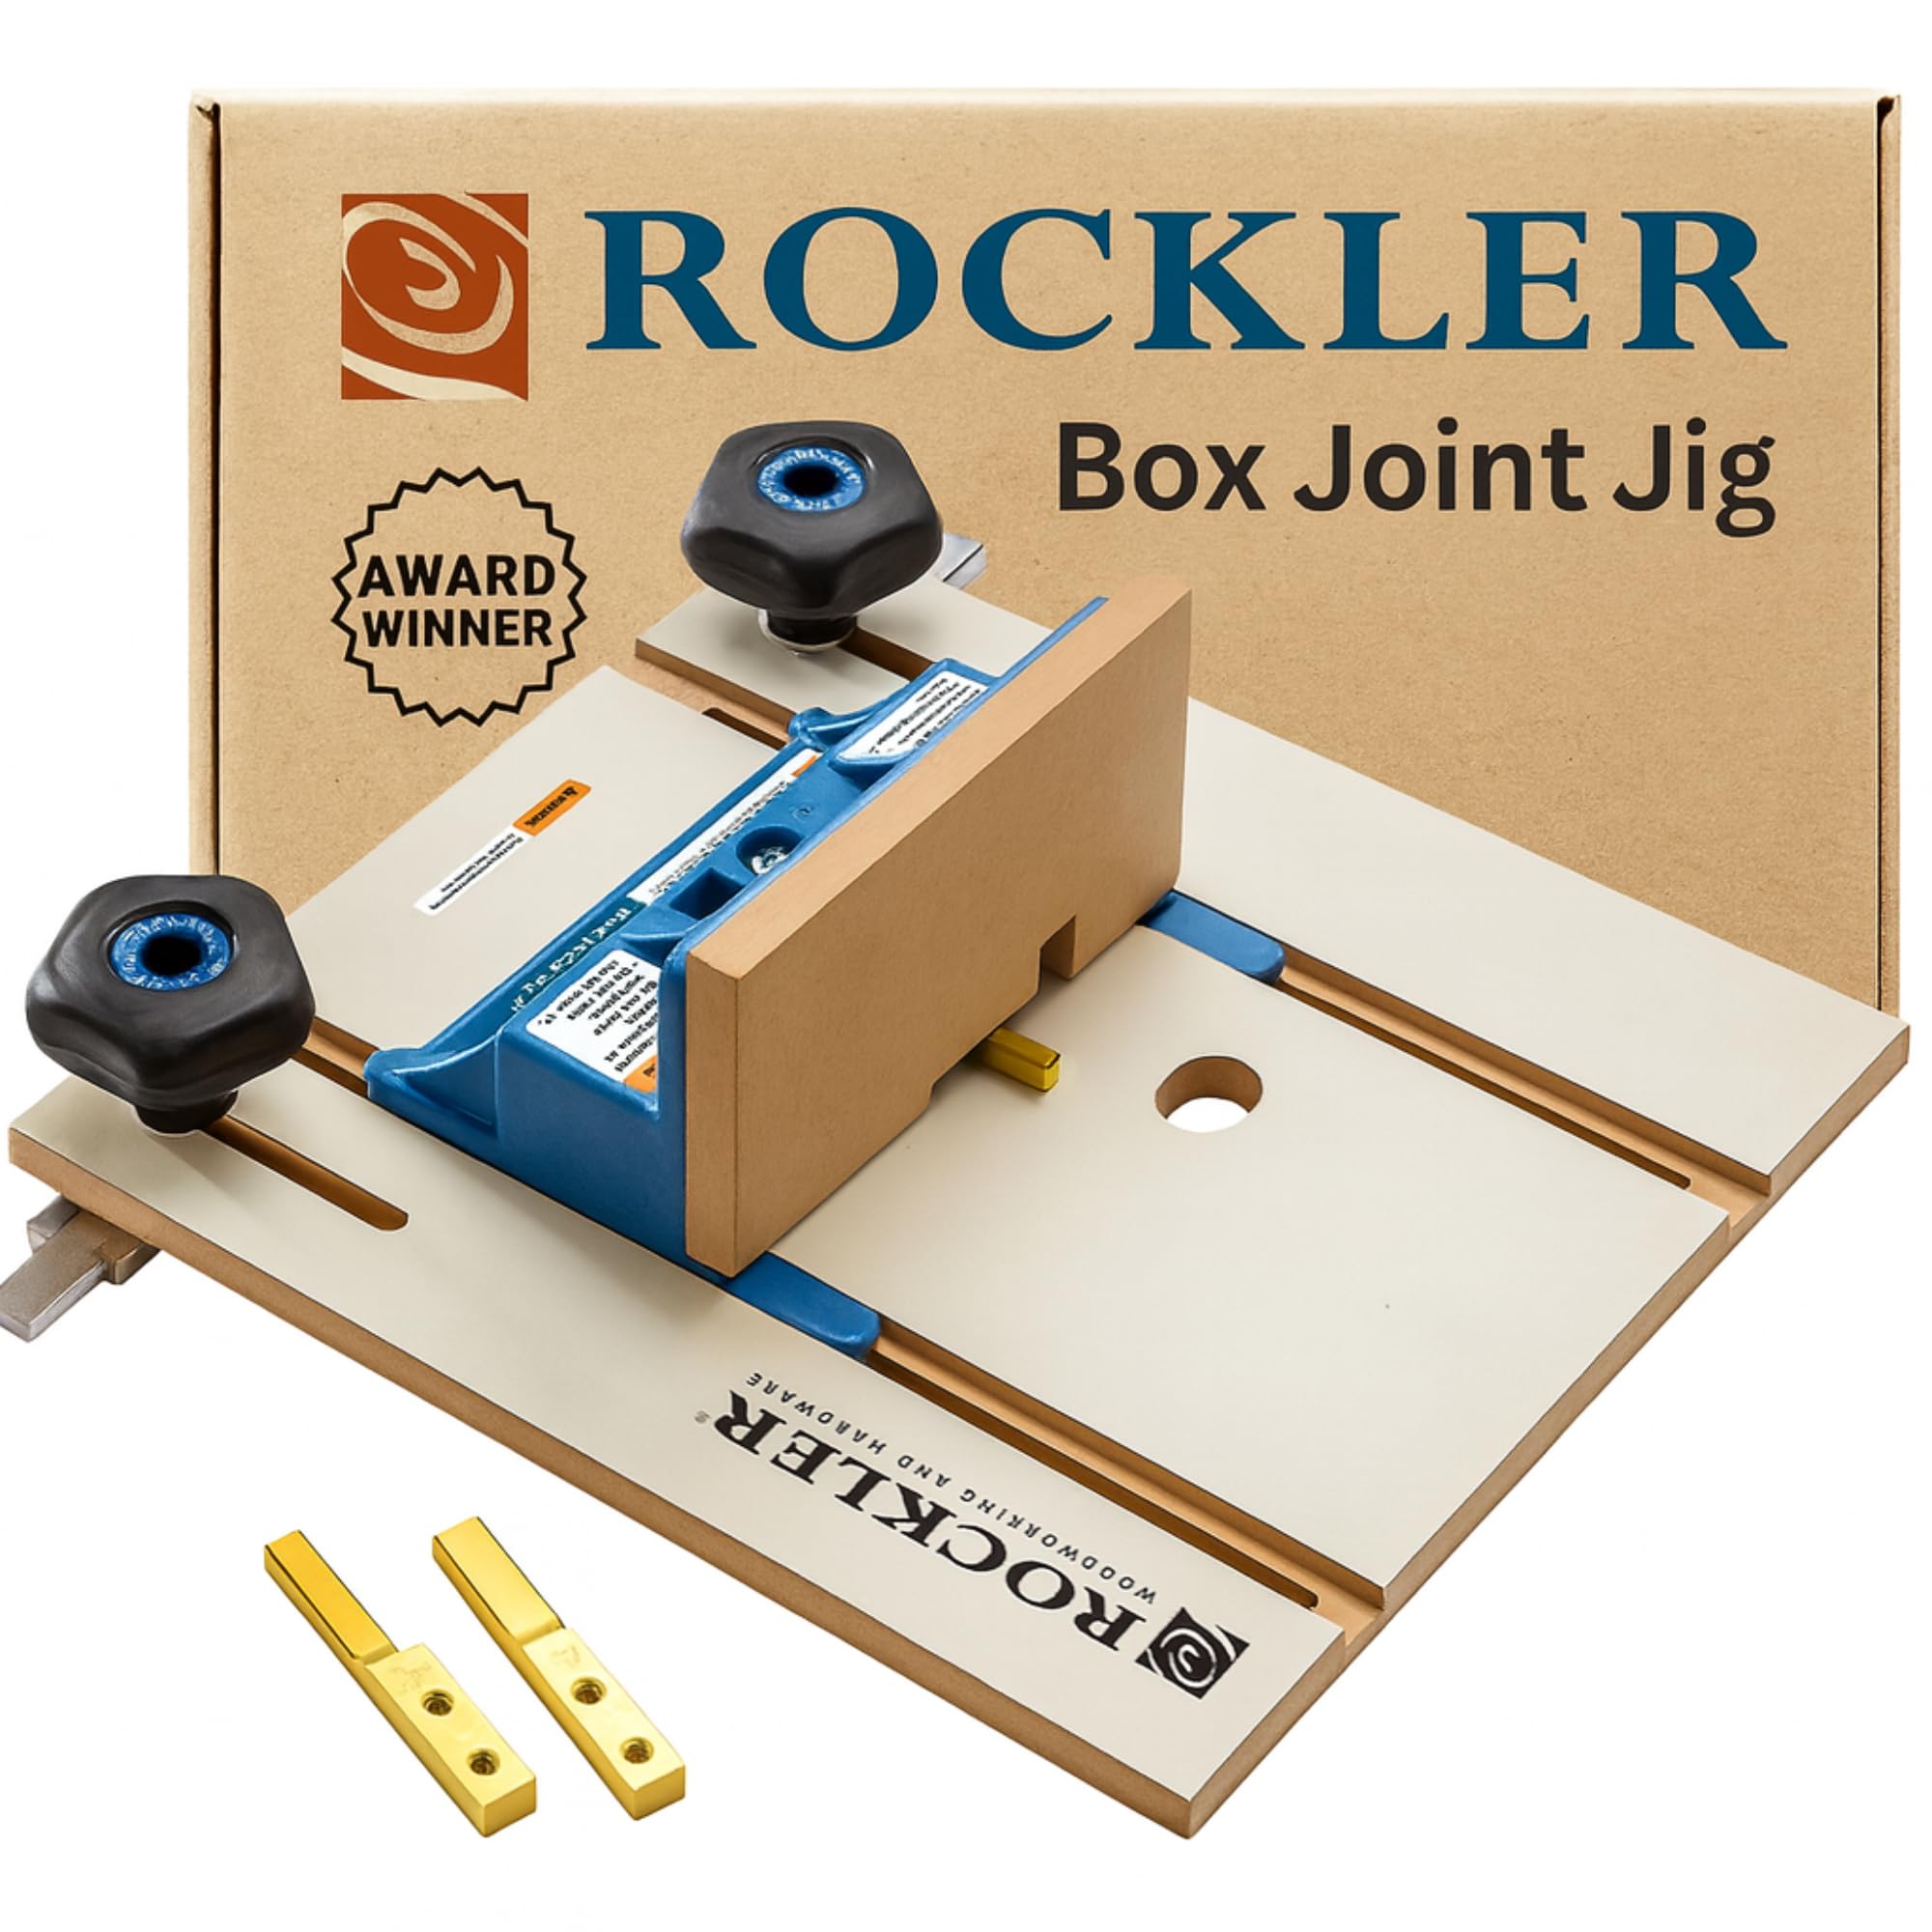
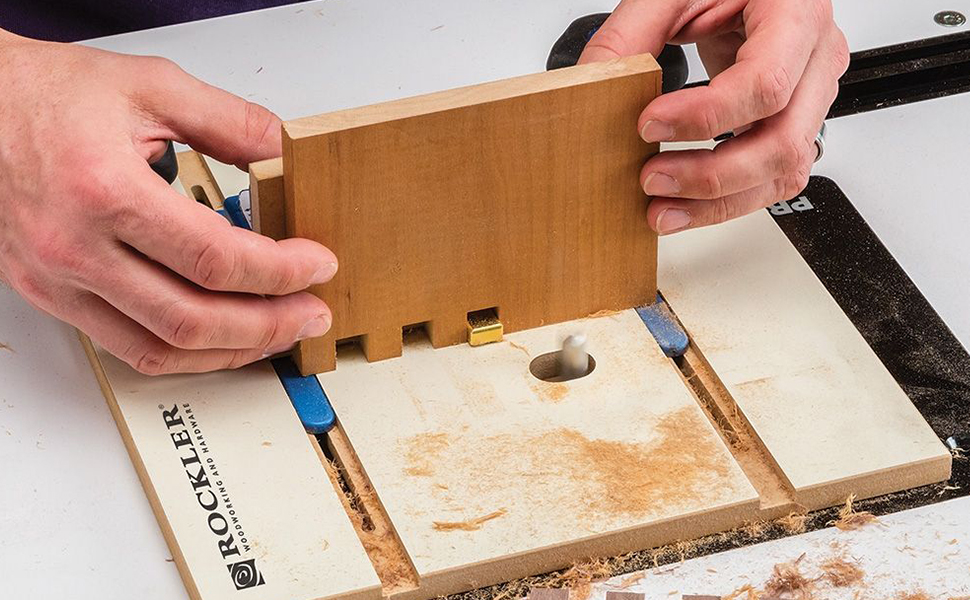
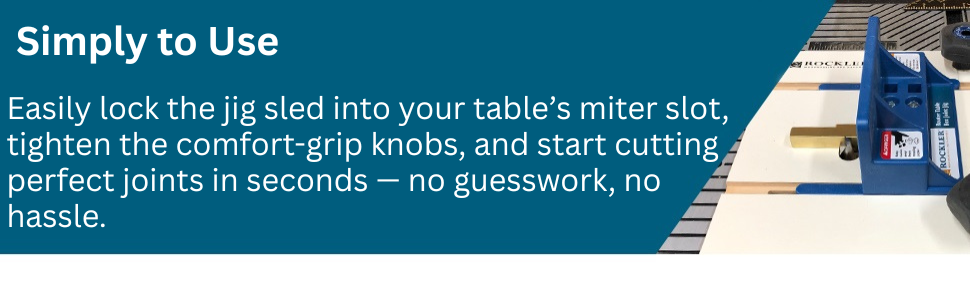
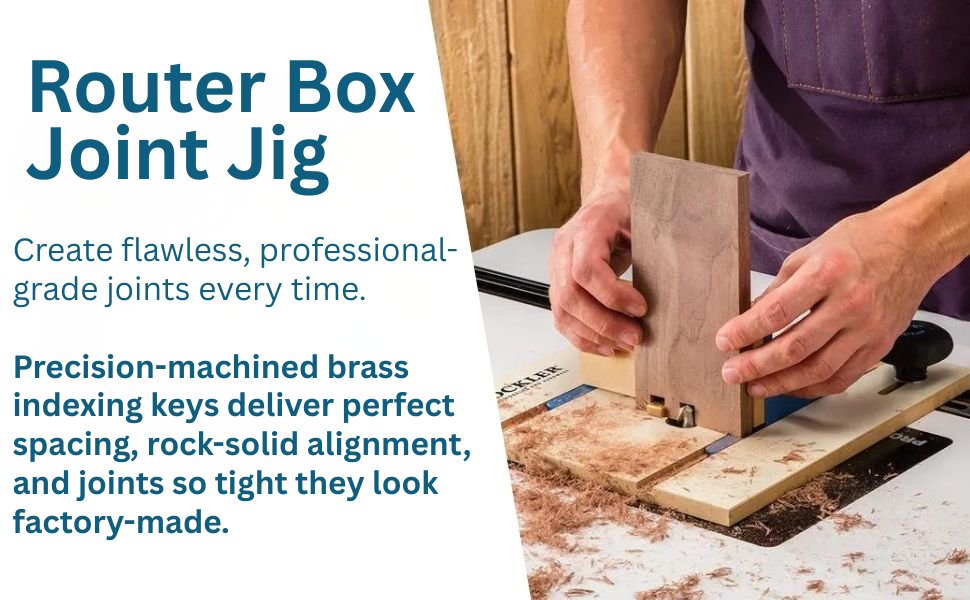
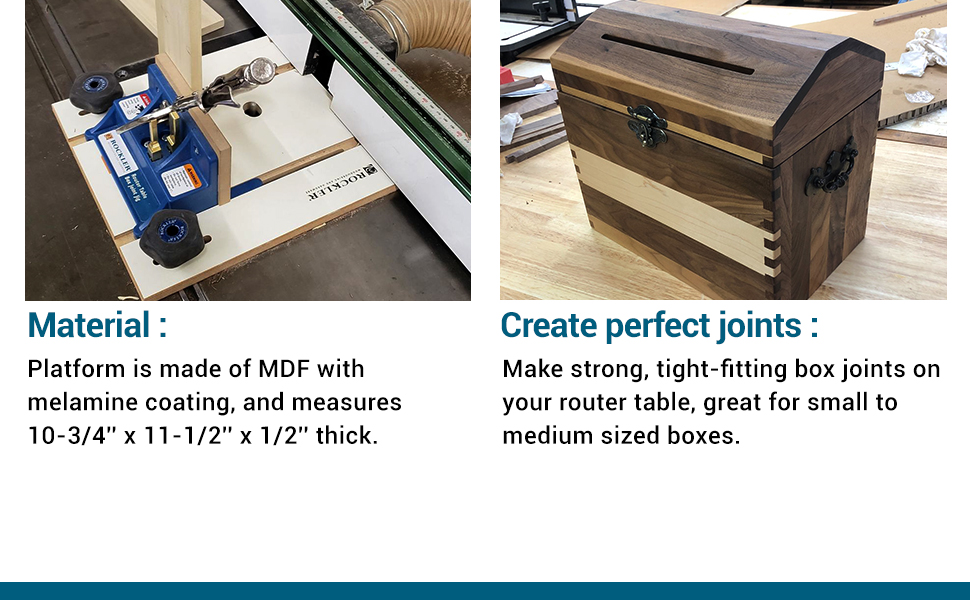
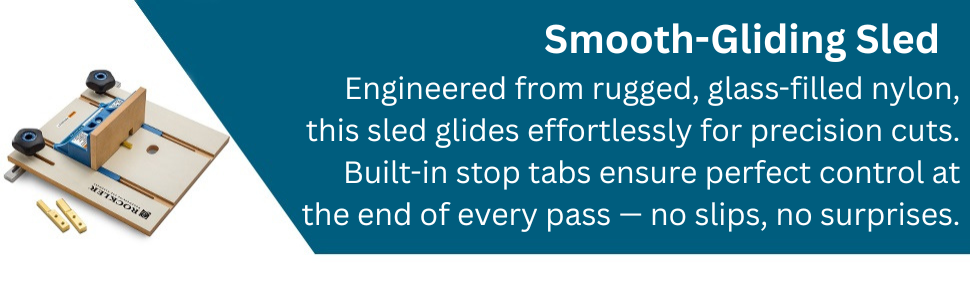
The Rockler Router Table Box Joint Jig is a professional-grade woodworking accessory designed for creating strong, tight-fitting box joints. Featuring precision-machined solid brass indexing keys in three finger widths (¼”, ⅜”, ½”), a low-friction melamine-coated MDF platform, and ergonomic locking knobs for secure miter slot attachment, this jig ensures repeatable, accurate cuts. Ideal for small to medium-sized boxes, it comes complete with all essential components to streamline your routing workflow and elevate your craftsmanship.

| ASIN | B07H7K4PK8 |
| Batteries Included? | No |
| Batteries Required? | No |
| Best Sellers Rank | #43,968 in Tools & Home Improvement ( See Top 100 in Tools & Home Improvement ) #106 in Power Tool Accessory Jigs |
| Brand | ROCKLER |
| Color | Yellow (Yellow) |
| Customer Reviews | 4.3 4.3 out of 5 stars (516) |
| Date First Available | June 22, 2008 |
| Global Trade Identification Number | 05024763208546 |
| Included Components | Router Table Box Joint Jig |
| Is Discontinued By Manufacturer | No |
| Item Package Quantity | 1 |
| Item Weight | 3.76 pounds |
| Item dimensions L x W x H | 12.99 x 11.26 x 3.7 inches |
| Item model number | 422866 |
| Manufacturer | Rockler |
| Material | MDF with melamine coating, Glass-filled nylon |
| Part Number | 422866 |
| Product Dimensions | 12.99 x 11.26 x 3.7 inches |
| Shape | Square |
| Style | Modern |
| UPC | 733175503228 733175295024 733353556985 |
D**K
They said it couldn't be done
I was looking to get into small box-making in the simplest way possible. I used a portable router, with an array of portable tables and jigs. For 1/4 inch joints, I started with a Dewalt 600b cordless router, a Bosch portable workbench, a Rockler Trim Router Table, a good carbide spiral up cut bit, and and this Rockler Box Joint Jig. After several days of experimentation, I came up with some pretty good, repeatable box joints. The procedure is as follows: 1) Clamp the Router Trim Table to the work bench. 2) Loosely clamp the Box Joint Jig the the Trim Table. 3) For 1/4 inch jigs, I used a 0.25 drill bit to set the distance from the 1/4 inch brass key to the router bit. A set of feeler gauges can help zero in on the distance. 4) Clamp everything tight. 5) Use a digital gauge to set bit height. Set the height roughly 0.010 more than the mating material thickness. I used a Wixey WR25 3" Mini Digital Height Gauge. This gauge really makes things easy. 5) Press work piece tightly against brass key, and make a test cut. 6) With a 1/4 inch joint, that first pin thickness should be 0.245-0.250. If the thickness is less than 0.245, the fit will get sloppy. If it is more than 0.250, it will be too tight, and the joints will not go together. For me, about 0.248 is the sweet spot. Get some digital calipers, and learn how to use it. 7) A second cut isn't necessary to dial in the fit. Loosen the clamps, and tap the Box Jig left or right as necessary to achieve the 0.245-0.250 pin width that you are looking for. 8) After the first cut is dialed in, make sure subsequent cuts ae made by pressing the workpiece tightly against the brass key. The key is only about 0.243 inch in width, so this step is important. The 3/8 and 1/2 inch joints follow the same procedure. This method is working for me, particularly for small, one-off projects. You would want something more substantial for making larger quantities of joints. I want to stress, that using digital calipers, and a digital gauge for router bit depth really help make this, or any other project less frustrating.
E**N
Works great, read review for super secret info
This jig works great. There are a few small flaws in it that I'll probably DIY fix to make it even better, but that's not the reason I'm leaving this review. I couldn't seem to find this info anywhere in the instructions, even though it is so obvious when you think about it-- When you're setting up the key, it needs to be exactly the distance away from the bit as the width of the key. Meaning you need setup blocks. I didn't have a set of setup blocks. I was upset. I just spent all of this money on a jig and now I need setup blocks to even use it? I looked at the jig and figured out that each key is tapered, but the taper only runs on the right side of the key. The left side is straight on all of the keys, and the left side is the side that you measure for distance from the router bit. This means the left side is the side that matters. So here's the super secret info that they didn't put in the instructions- This means the if I want to use a 1/4" router bit with the 1/4" key to make 1/4" fingers, I will fasten the 3/8" key into the jig. I will then use the 1/4" key as the "setup block" . After adjusting the jig and securing it, pull the 3/8" key out and replace with the 1/4" key. Now the jig is set up for 1/4" finger joints without setup blocks. Why that little bit of very important info isn't in the instructions is beyond me. I setup the jig like this and made perfect fingers without having to readjust the width of the fingers. I just set it and began production on the project in the attached picture.
J**S
Pretty good.
I like what this jig does but you really have to do a lot fine tuning. Once dialed in it seems to work pppretty good.
R**N
Make sure T-track knobs are fastened very tightly
Excellent product which has allowed me to make many boxes from 1/4 inch hardwood. Two tips: Use a precise spacer bar to set the distance between the router bit and the metal key. I tried using a 1/4 inch drill bit but did not get good results. Second, make sure the T-track knobs are fastened very tightly. When I hand-tightened them I found there was some creep which forced me to file down the box joints to get them to fit properly. Use a wrench.
B**C
Very Good Quality!
This Rockler Box Joint is easy to setup and work with. I recently made a Presentation/Storage Box for Pie. I used the 1/4" Bit and Key and the box came out perfectly. I also happen to be legally Blind, so that says a lot for the quality and accuracy of this unit. I highly recommend this unit!
F**N
Doesn’t fit Kobalt brand tables
Doesn’t fit my Kobalt router table. It looks like it would be fine if my router table had wider slots. Oh well! I’ll sell it to someone, hopefully. Or make my own router table that it will fit.
K**R
Nice
My husband loves it. Only problem was the pins didn’t come with. Didn’t know until after Christmas so now I have to order them.
P**Y
Fatally flawed tool
The fatal flaw with this jig is that the guide bar is attached to the jig instead of the fence. This causes the work piece to bind as you attempt to push it past the router bit. Sometimes the binding is minor sometimes it is very tight and requires an enormous amount of pressure to push the work piece into the router blade. All that pressure causes the table to move ever so slightly and can easily ruin a work piece. It also creates a potentially dangerous situation since one slip with all the force against the work piece could cause a hand to get in the way of the bit. This also causes any flex that the fence has to be exaggerated. Hence all the remarks about how flimsy this tool is. Save your hands and your money and skip this one. A tool where the fence and the guide are attached and move as one piece is a much better design.
E**E
Il prodotto si presenta fatto con ottimi materiali e ben progettato. Non ho avuto modo di provarlo in quanto non compatibile Infatti vanno fatte alcune considerazioni e controlli prima di acquistarlo: Il JIG si aggancia alla t-track del banco fresa, perché si agganci è necessaria una distanza minima di 12,5 cm tra il centro della fresa e il canale, è comunque possibile allungare la fresata di aggancio L’aggancio si effettua tramite spessori in metallo da inserire nella t-track; questi una volta tirati dalle manopole dovrebbero allargarsi e garantire la stabilità del supporto. Questi spessori hanno forma rettangolare con il lato in alto di 20 mm e spessore 9,3 mm quindi vanno bene per le t-track comuni larghe esternamente 30 mm. Altro problema è che gli spessori che fanno da riferimento per creare i denti dell’incastro sono in misure imperiali: 1/2, 1/4 e 3/8. Questo in se va bene salvo che bisogna avere le frese delle stesse dimensioni e queste in genere vengono vendute con codoli imperiali e quindi poi necessitano di mandrini (pinze) del router che riescono a lavorare con queste misure Insomma niente di impossibile ma prima di acquistare fate un passaggio per verificare tutti questi dettagli, se siete attrezzati potrebbe essere un buon acquisto
R**Z
Ware ist gut angekommen. Vielen Dank
G**O
il est bien fait, solide, par contre c'est pour des mesures en pouce et pas en mm. si vous avez pas les bonnes fraises c'est inutilisable
D**D
I found this jig to be very user-friendly on my Bosch RA1181 router table. Using a scrap pine board bandsawed/planed to 3/8” thickness, I did a couple of test runs, adjusting the spacing very slightly for the second round. The cuts were very clean even on wood this soft. I then proceeded to make a box to store the jig and sacrificial backers I made for 1/4”, 3/8” and 1/2” joints (using plywood scraps). For the next project, replicating a small cheese grating box in a larger size, I used a 1/4” spiral bit on pine for the drawer, and a 3/8” one on Swiss Pear for the outer case. The jig again worked flawlessly. Later I built another box out of pine to hold our Mercato pasta machine (got carried away carving the top for it), and it works predictably well each time. Very happy with this jig.
P**G
Does exactly what it's supposed to do....... I'm very pleased and postage although from over seas from Australia it came very quickly...... Thank you
Trustpilot
1 month ago
2 months ago


